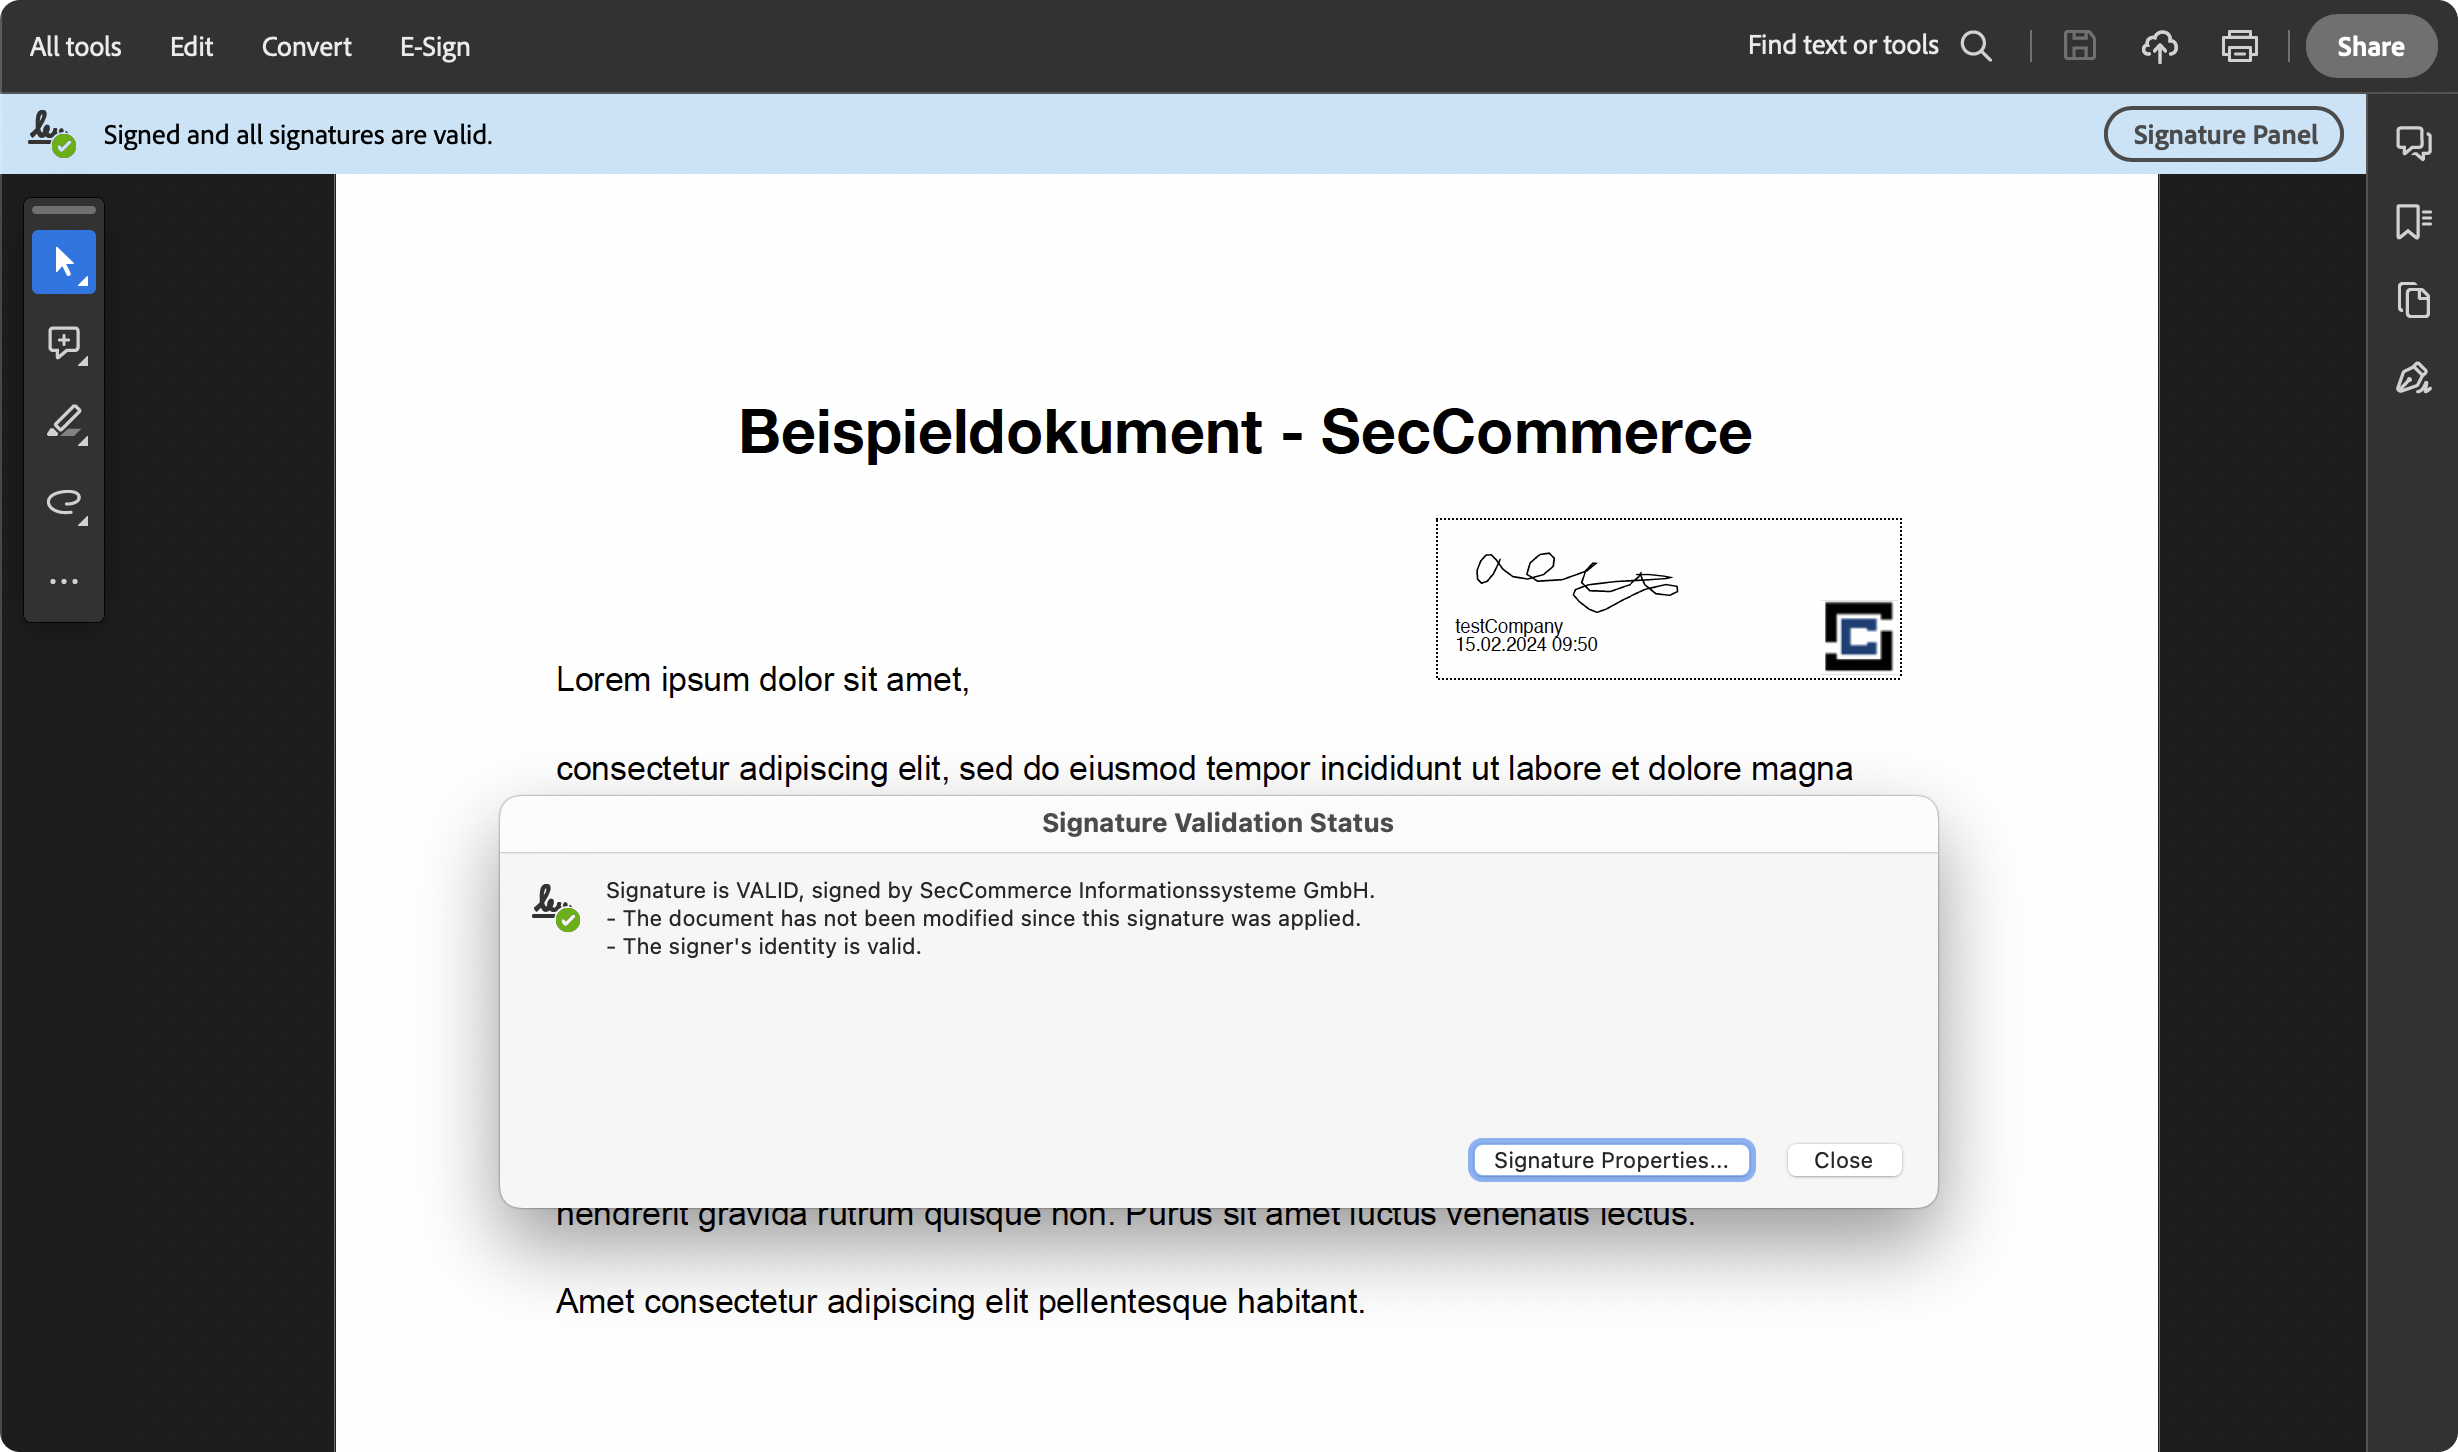
Learn more about the use of seals in our Signature Portal. You can also use a seal in combination with a simple signature to increase the evidential value in workflowsMore information about our Signature Portal The important difference to the qualified signature is that the seal is issued to a legal entity, for example, an authority or a company, and no 2FA is required by the user. The sealing process with remote sealing and with the signature card can thus be fully automated in workflows and processes. A qualified seal can be used as a smart card (seal card), HSM, or as remote seal with our software. For a deeper insight into the electronic seal, also visit The “Qualified Seal ID” is a software certificate that can be purchased directly through us or D-Trust. It is a software certificate that can then be securely created and stored on our server for use. More information can be found on the following page of D-Trust. The Qualified Seal ID offers the following advantages: With a qualified certificate = Green check in Adobe during signature verification The remote seal is a qualified remote seal and is security-wise on a similar level as the advanced or qualified remote signature. The crucial difference is that no 2-factor authentication like with the Qualified Electronic Signature is required. Also, no physical signature card or seal card is required anymore.
For qualified sealing, you can use our SecPKI Server (SecSign ID Server). You operate the SecPKI Server in your own data center or a data center of your choice.
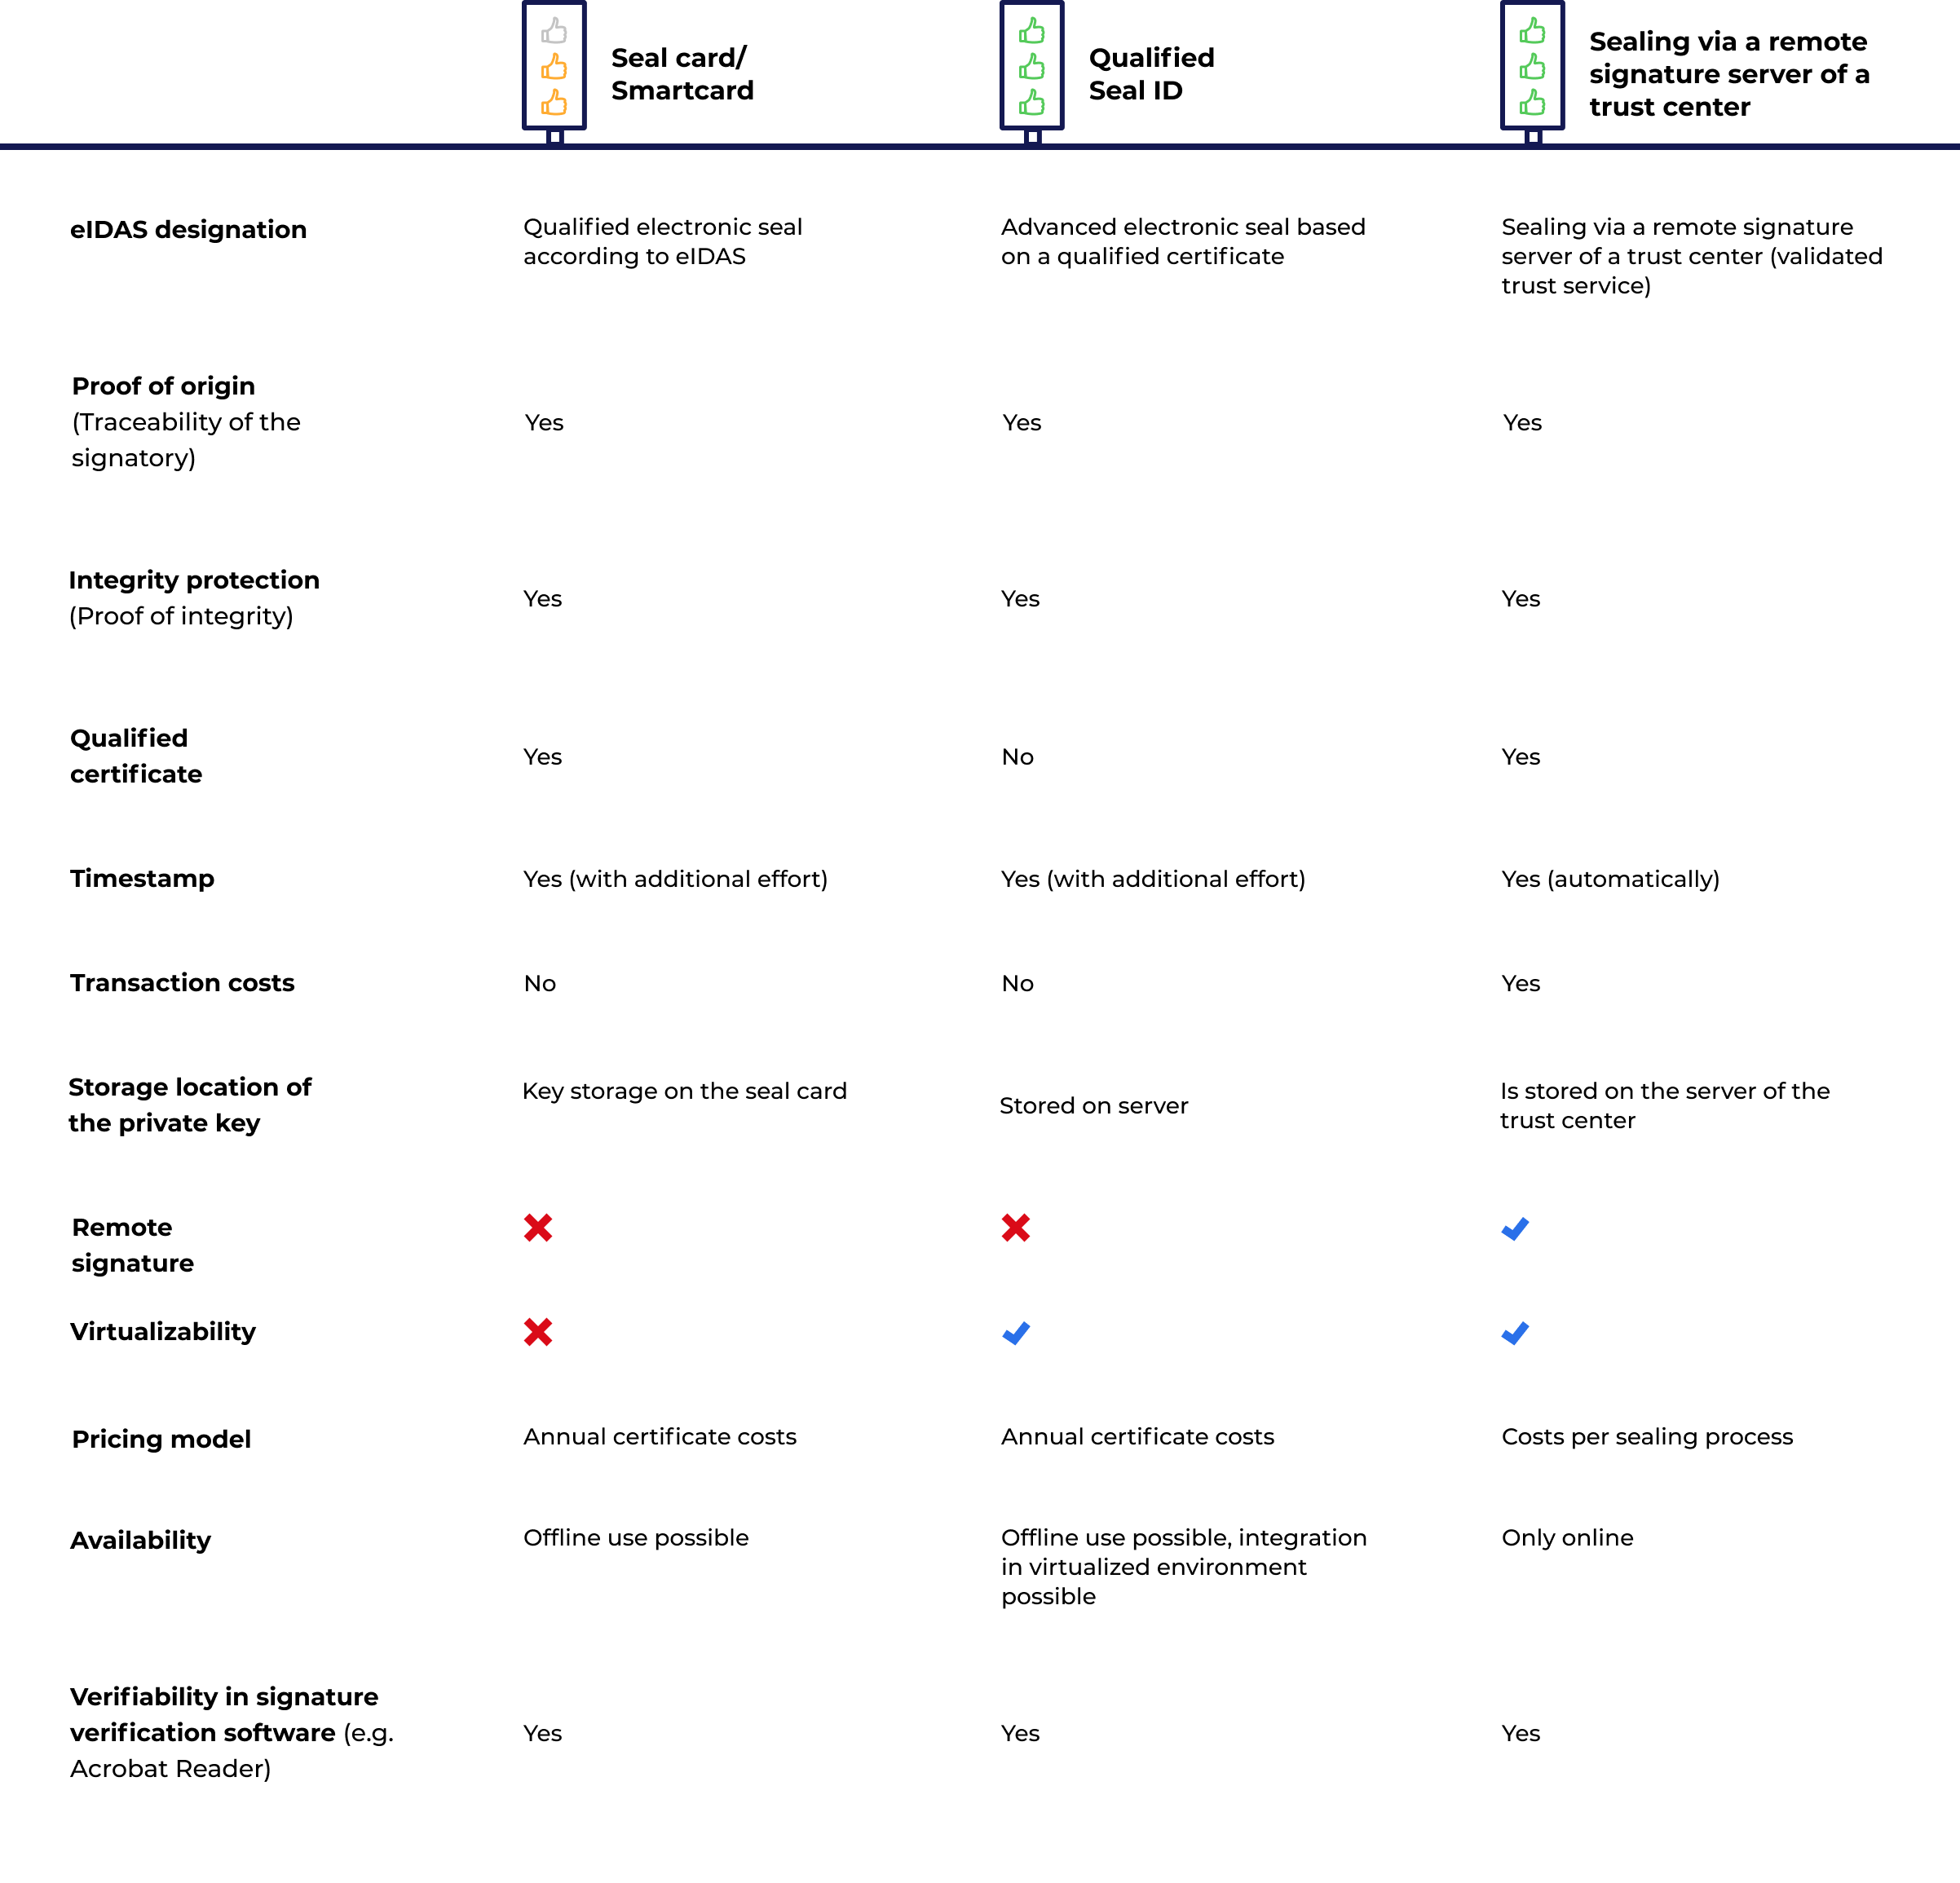
D-Trust Seal Cards: Qualified Electronic Seals
Simply insert the seal card into a card reader. Connect to the SecPKI Server and the sealing can begin immediately. You can automate sealing with the card like with all other variants mentioned above or through the GUI of the signature and seal portal. The cards are very efficient, but if a higher volume of seals is needed, multiple cards can be connected to the SecPKI Server. The signature annotation plays a special role in sealing. A seal certificate is not issued to a natural person but to a legal entity, for example, a company. The signature annotation can then contain only a reference to the legal entity or also contain information that can be attributed to a natural person -> For example, the natural person who placed the seal in the PDF could be listed on the signature annotation. In our software, it is freely configurable what the seal should look like and which users are allowed to access it. Furthermore, it can be configured that it is always logged which (authenticated) person actually used the seal, even without it being stated in the signature annotation. Especially in the fields of law, banking, federal and security agencies, citizen services offices, e-commerce, FinTechs, industries, and especially in ministries, seals are used to secure evidential value. Often in combination with other levels of signature or a 2-factor authentication. The main purpose of the electronic seal is to secure the proof of origin and the integrity of the sent document. In our Signature Portal, there is more than one way to seal. For different requirements, we offer various scenarios for sealing. From direct sealing at the push of a button to fully automated sealing, everything is possible. We have a comprehensive API that allows us to work with almost all systems. Below we present a few use cases on how electronic sealing can be realized.
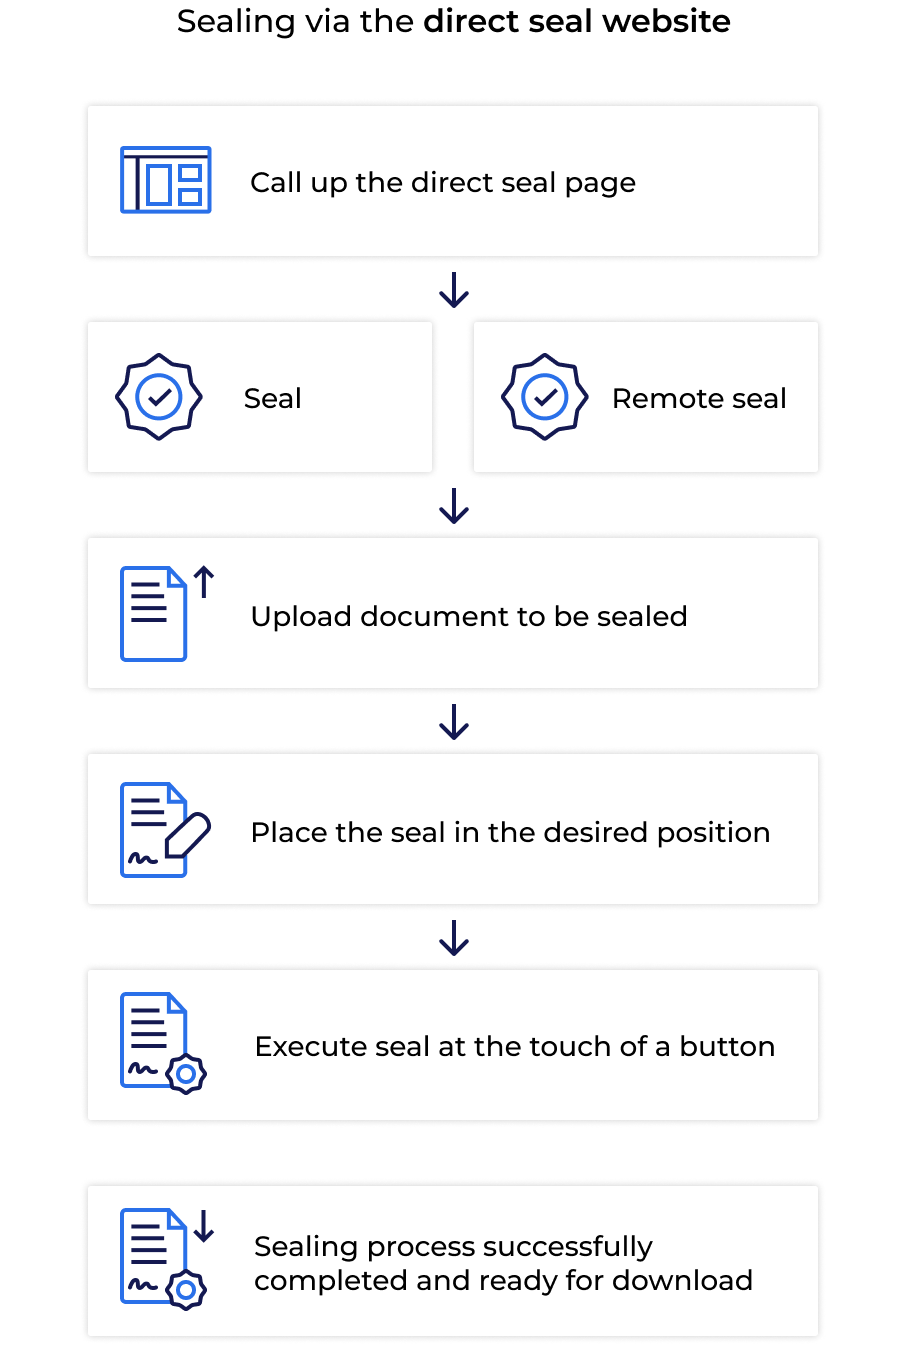
The following very popular example shows sealing by a user and the website of the Signature Portal.
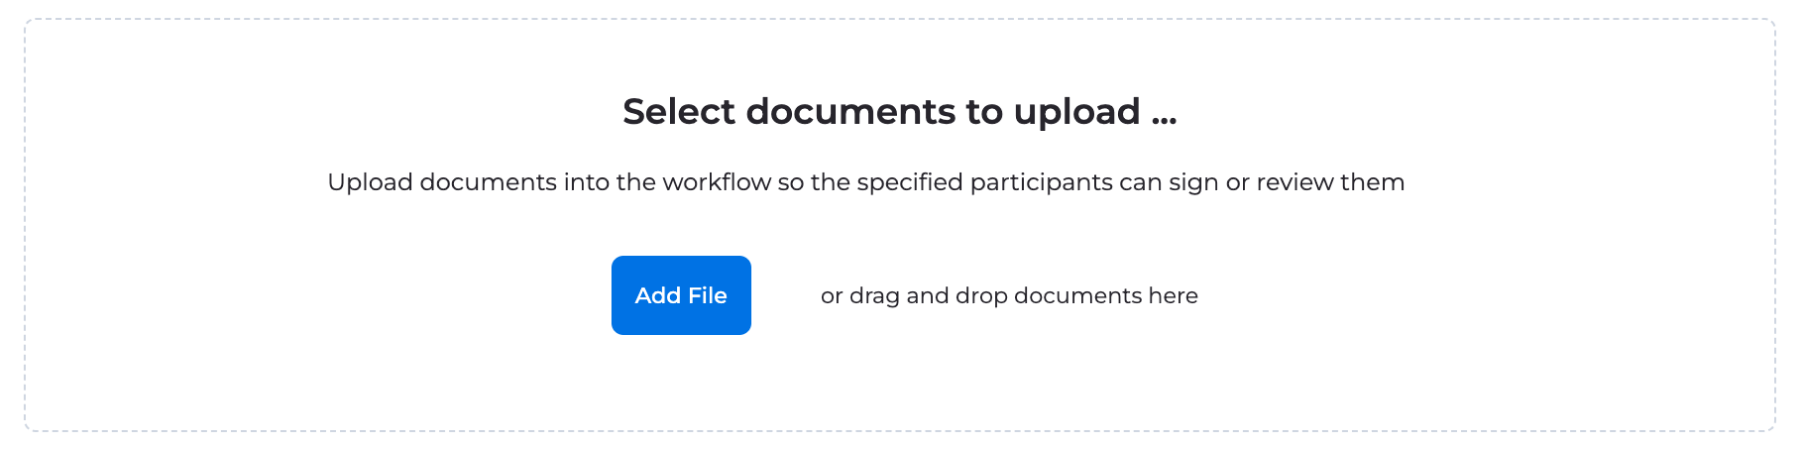
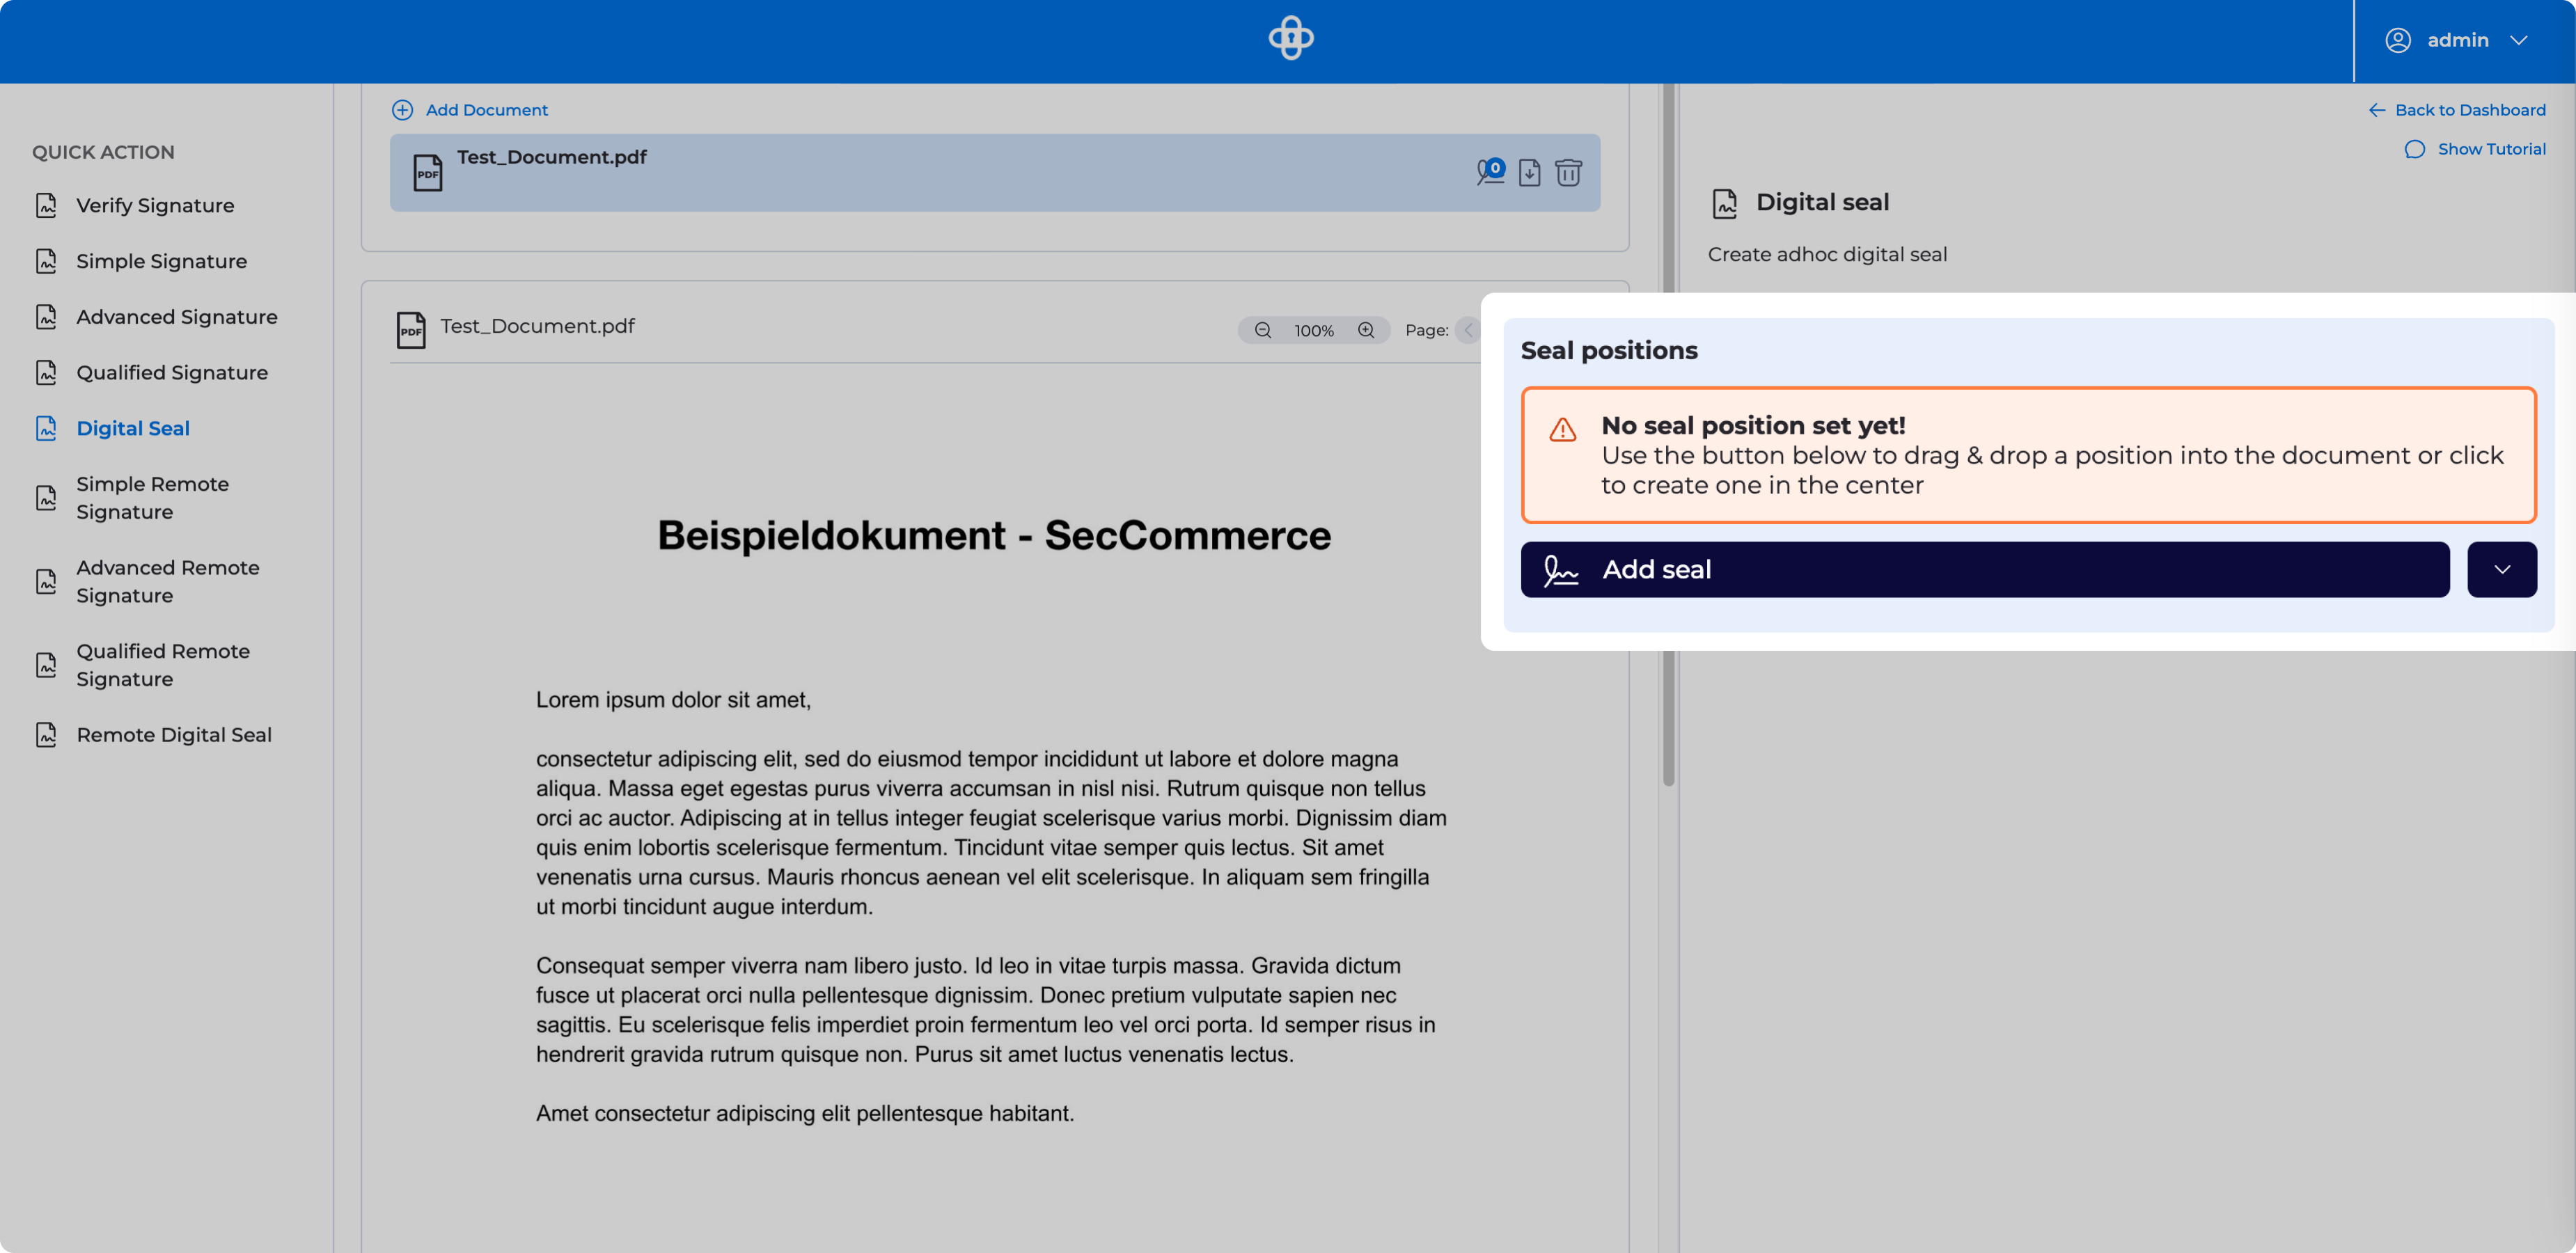
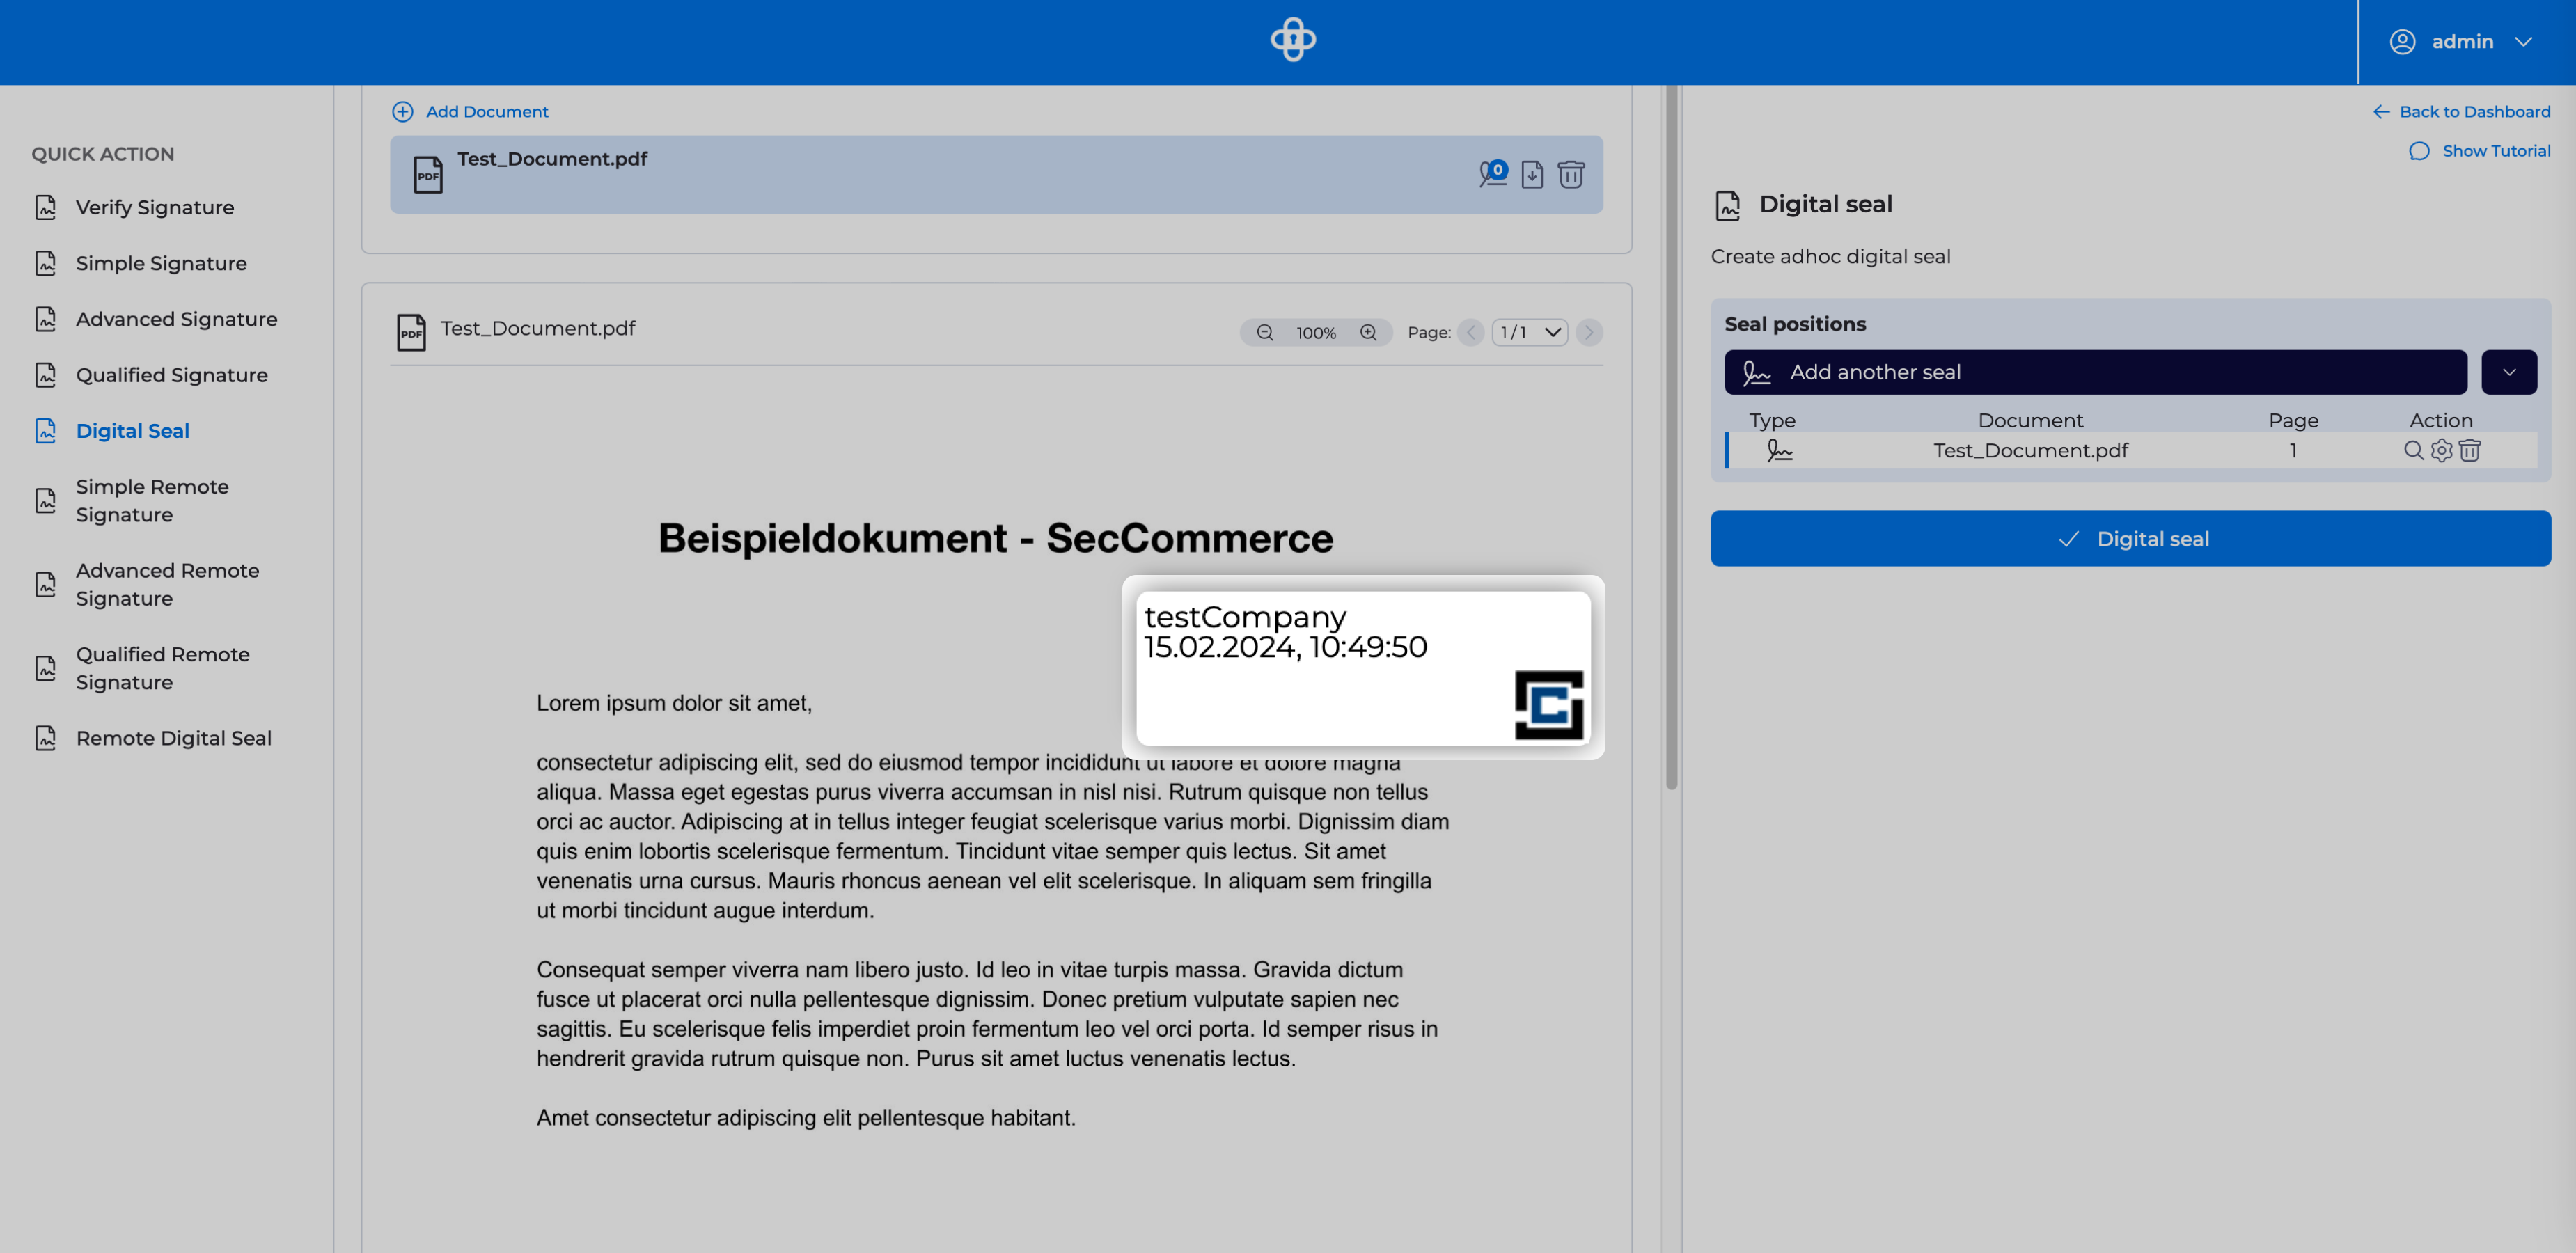
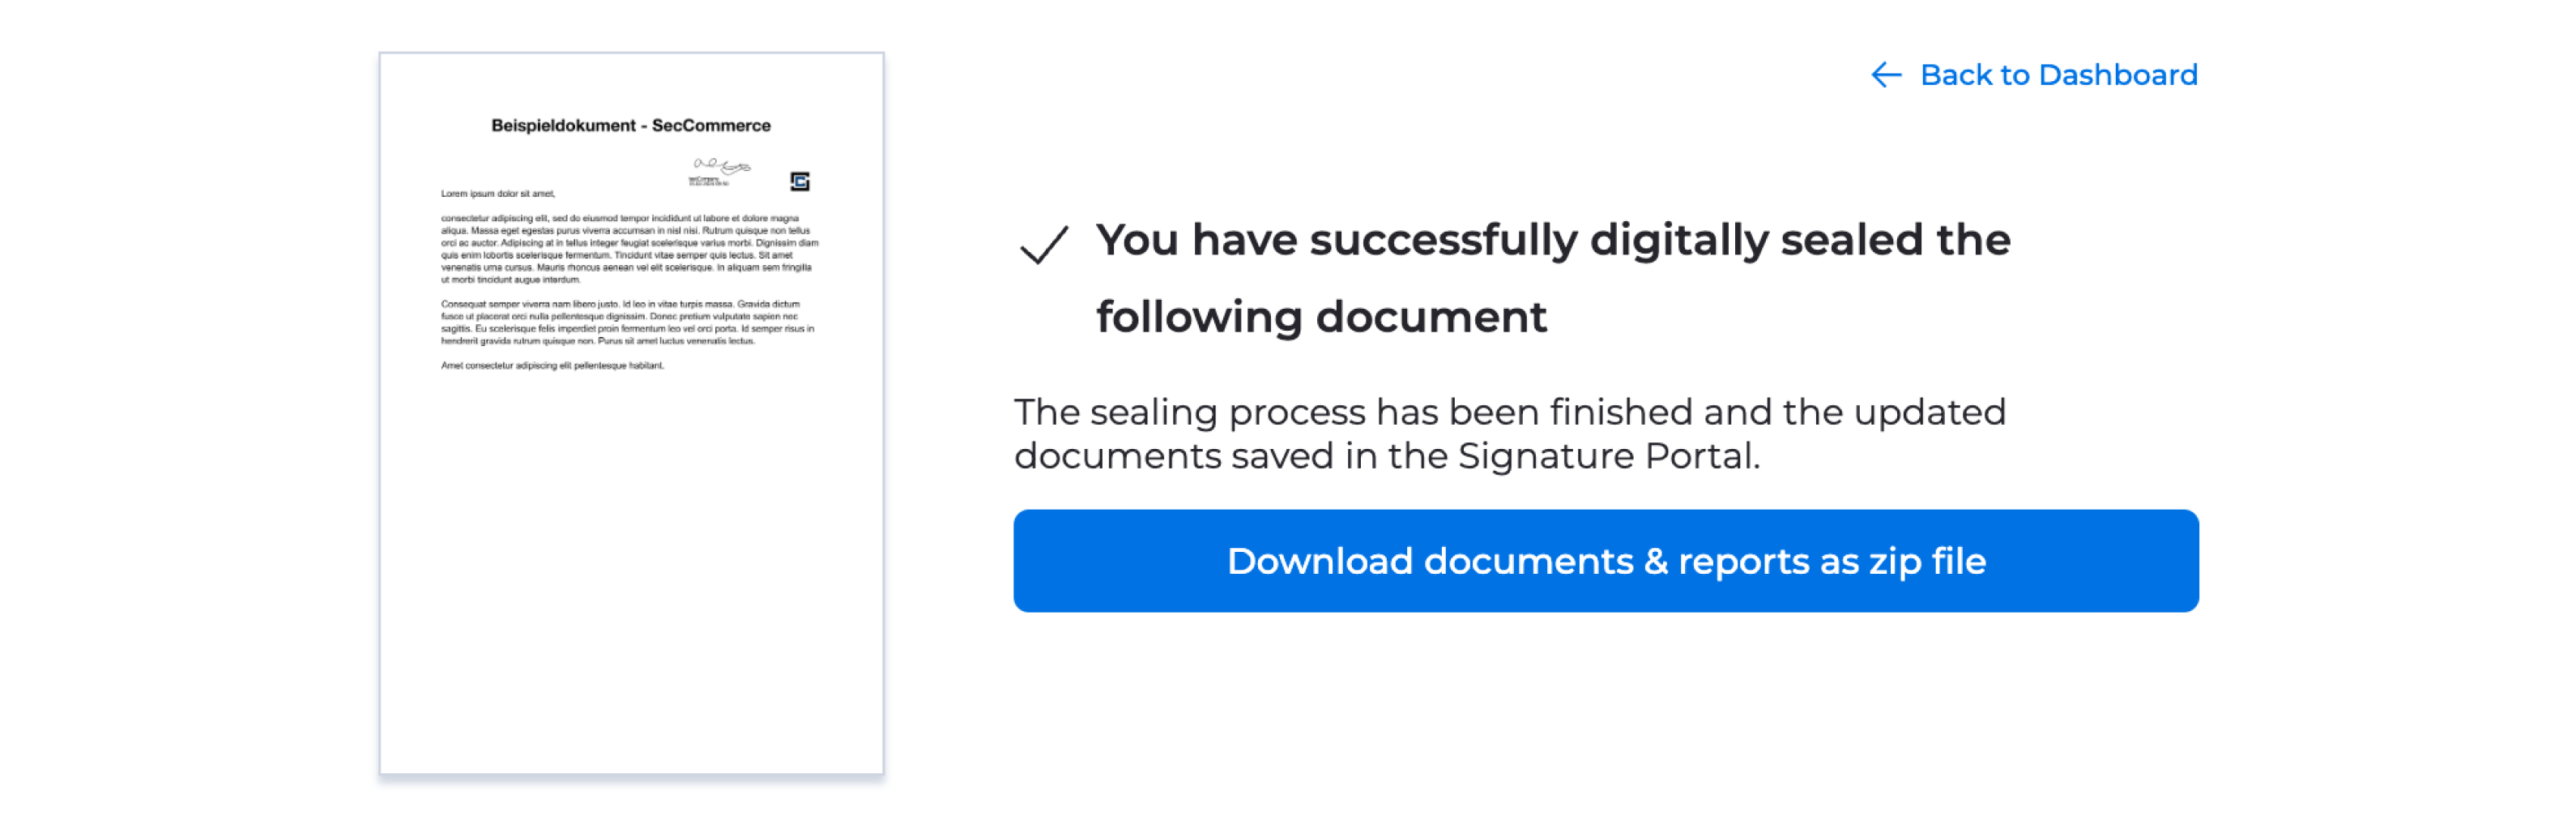
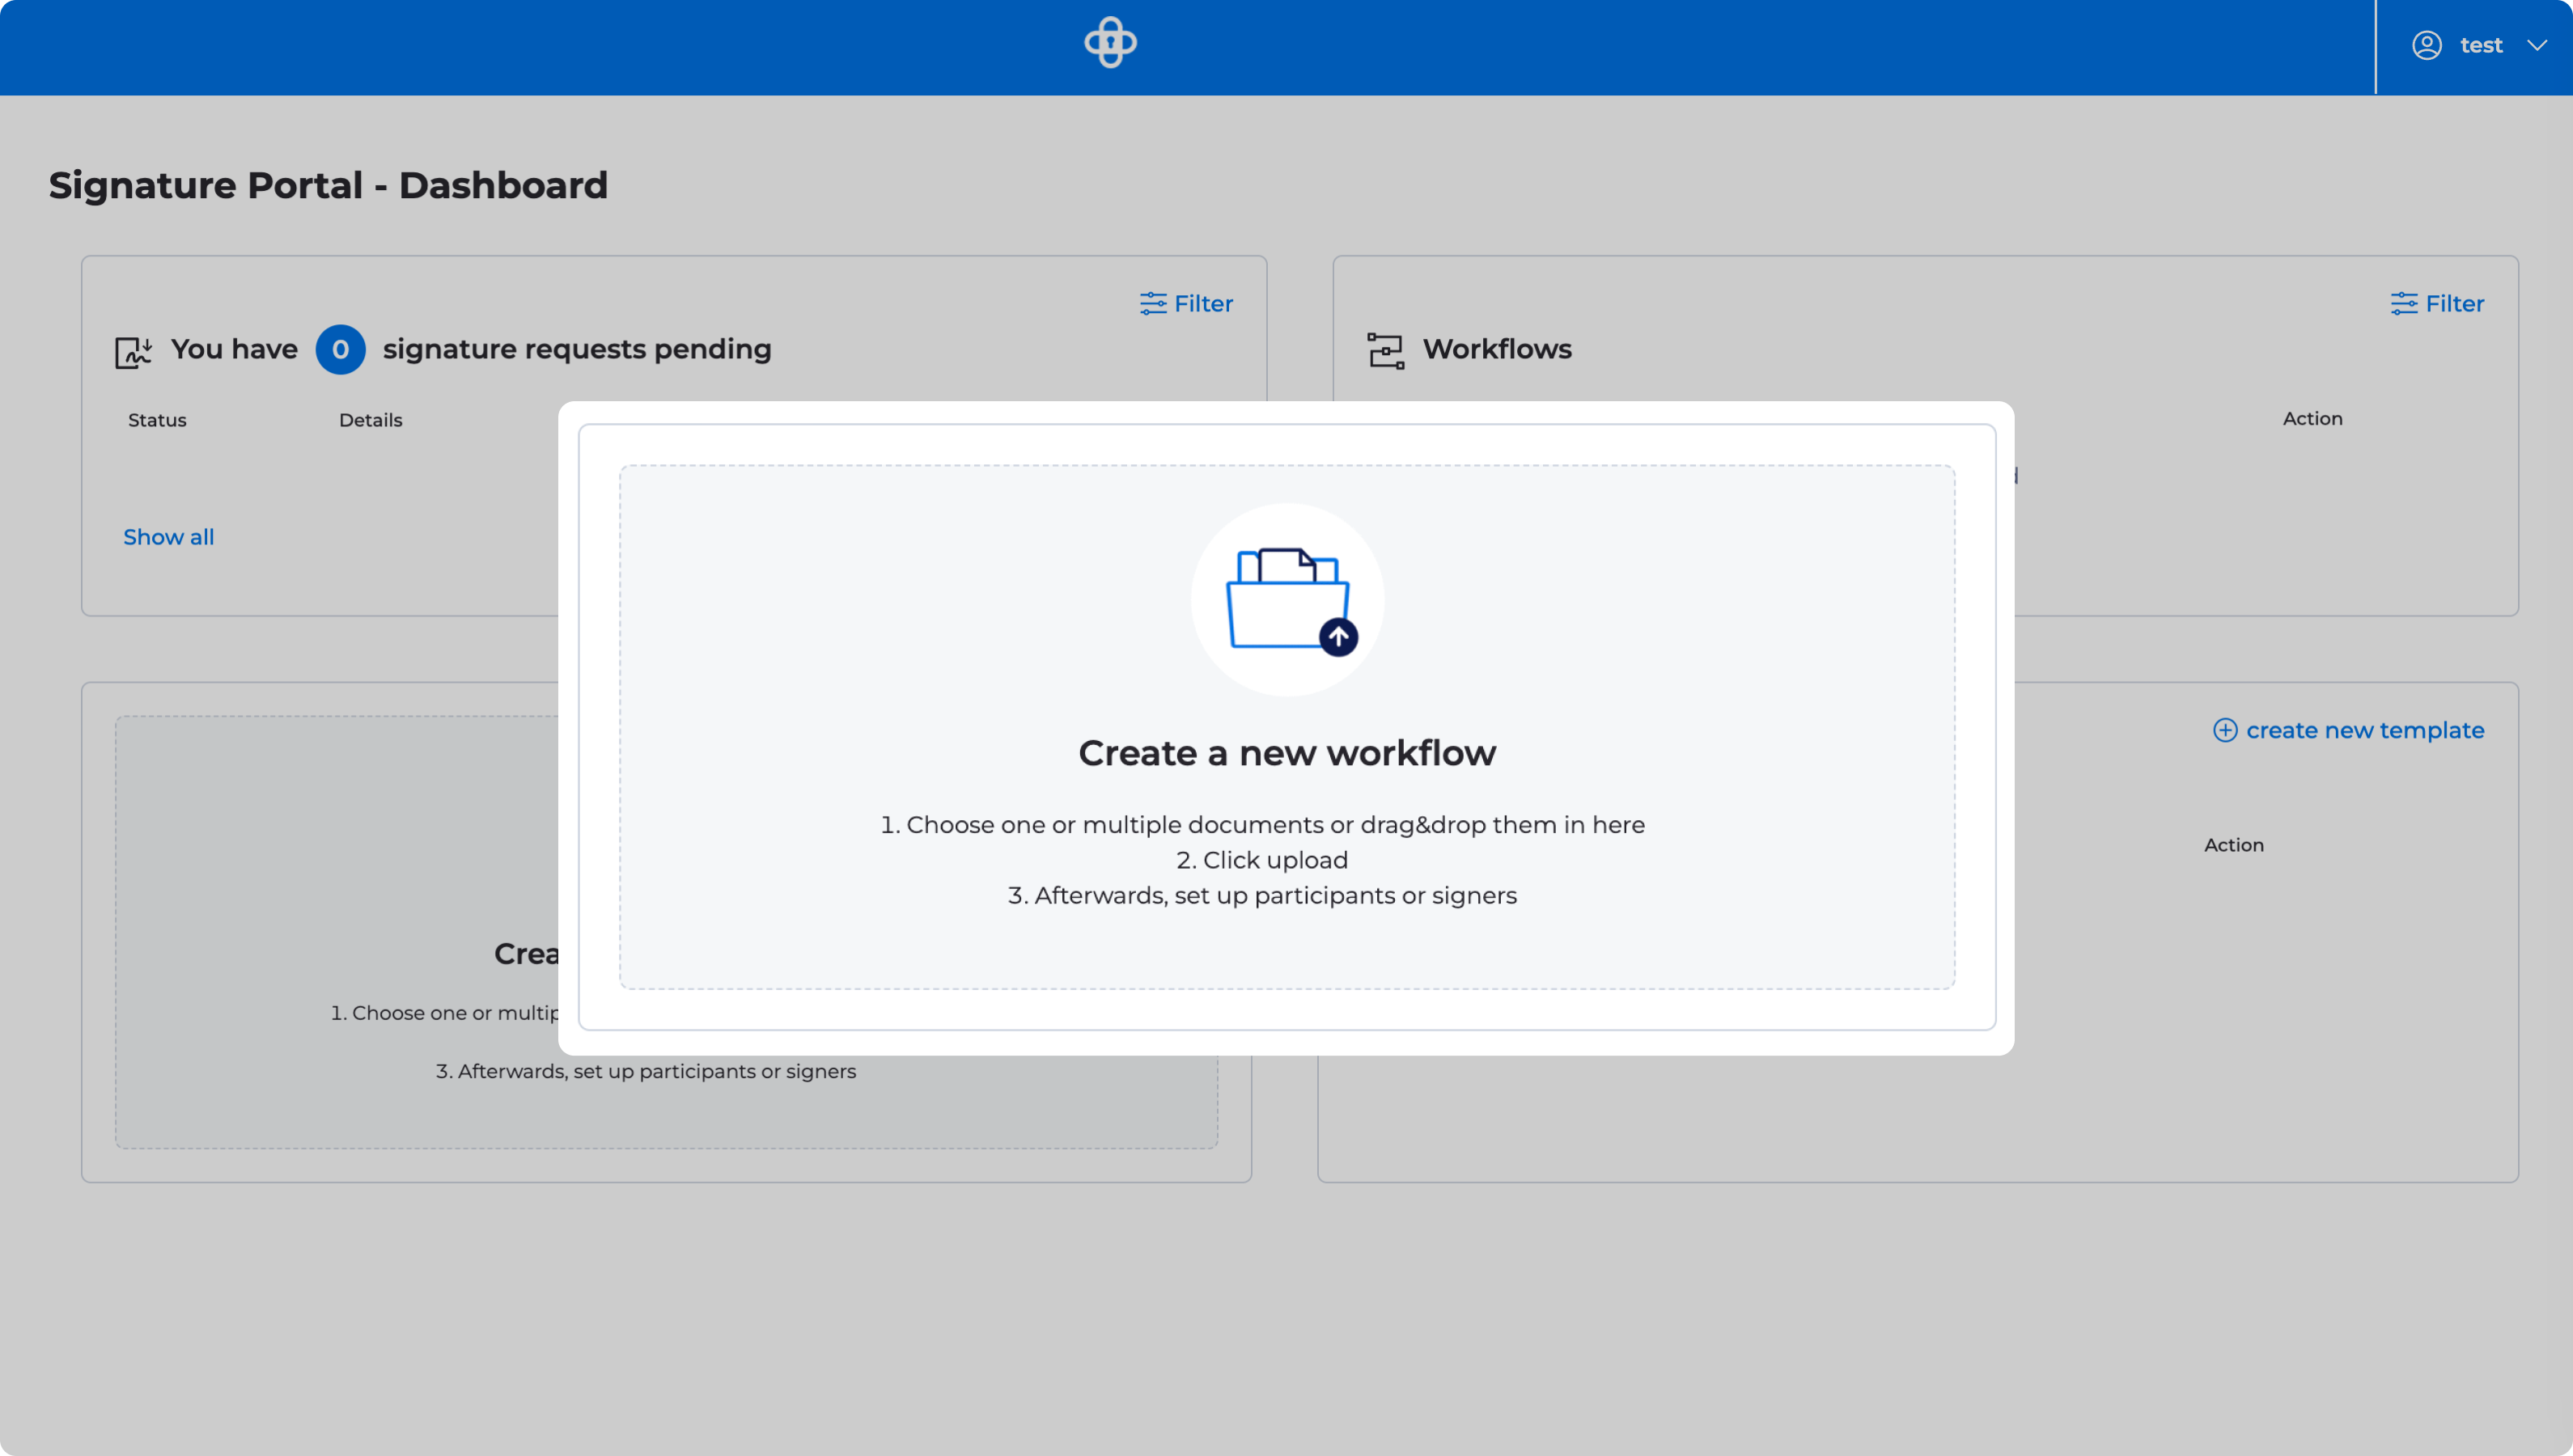
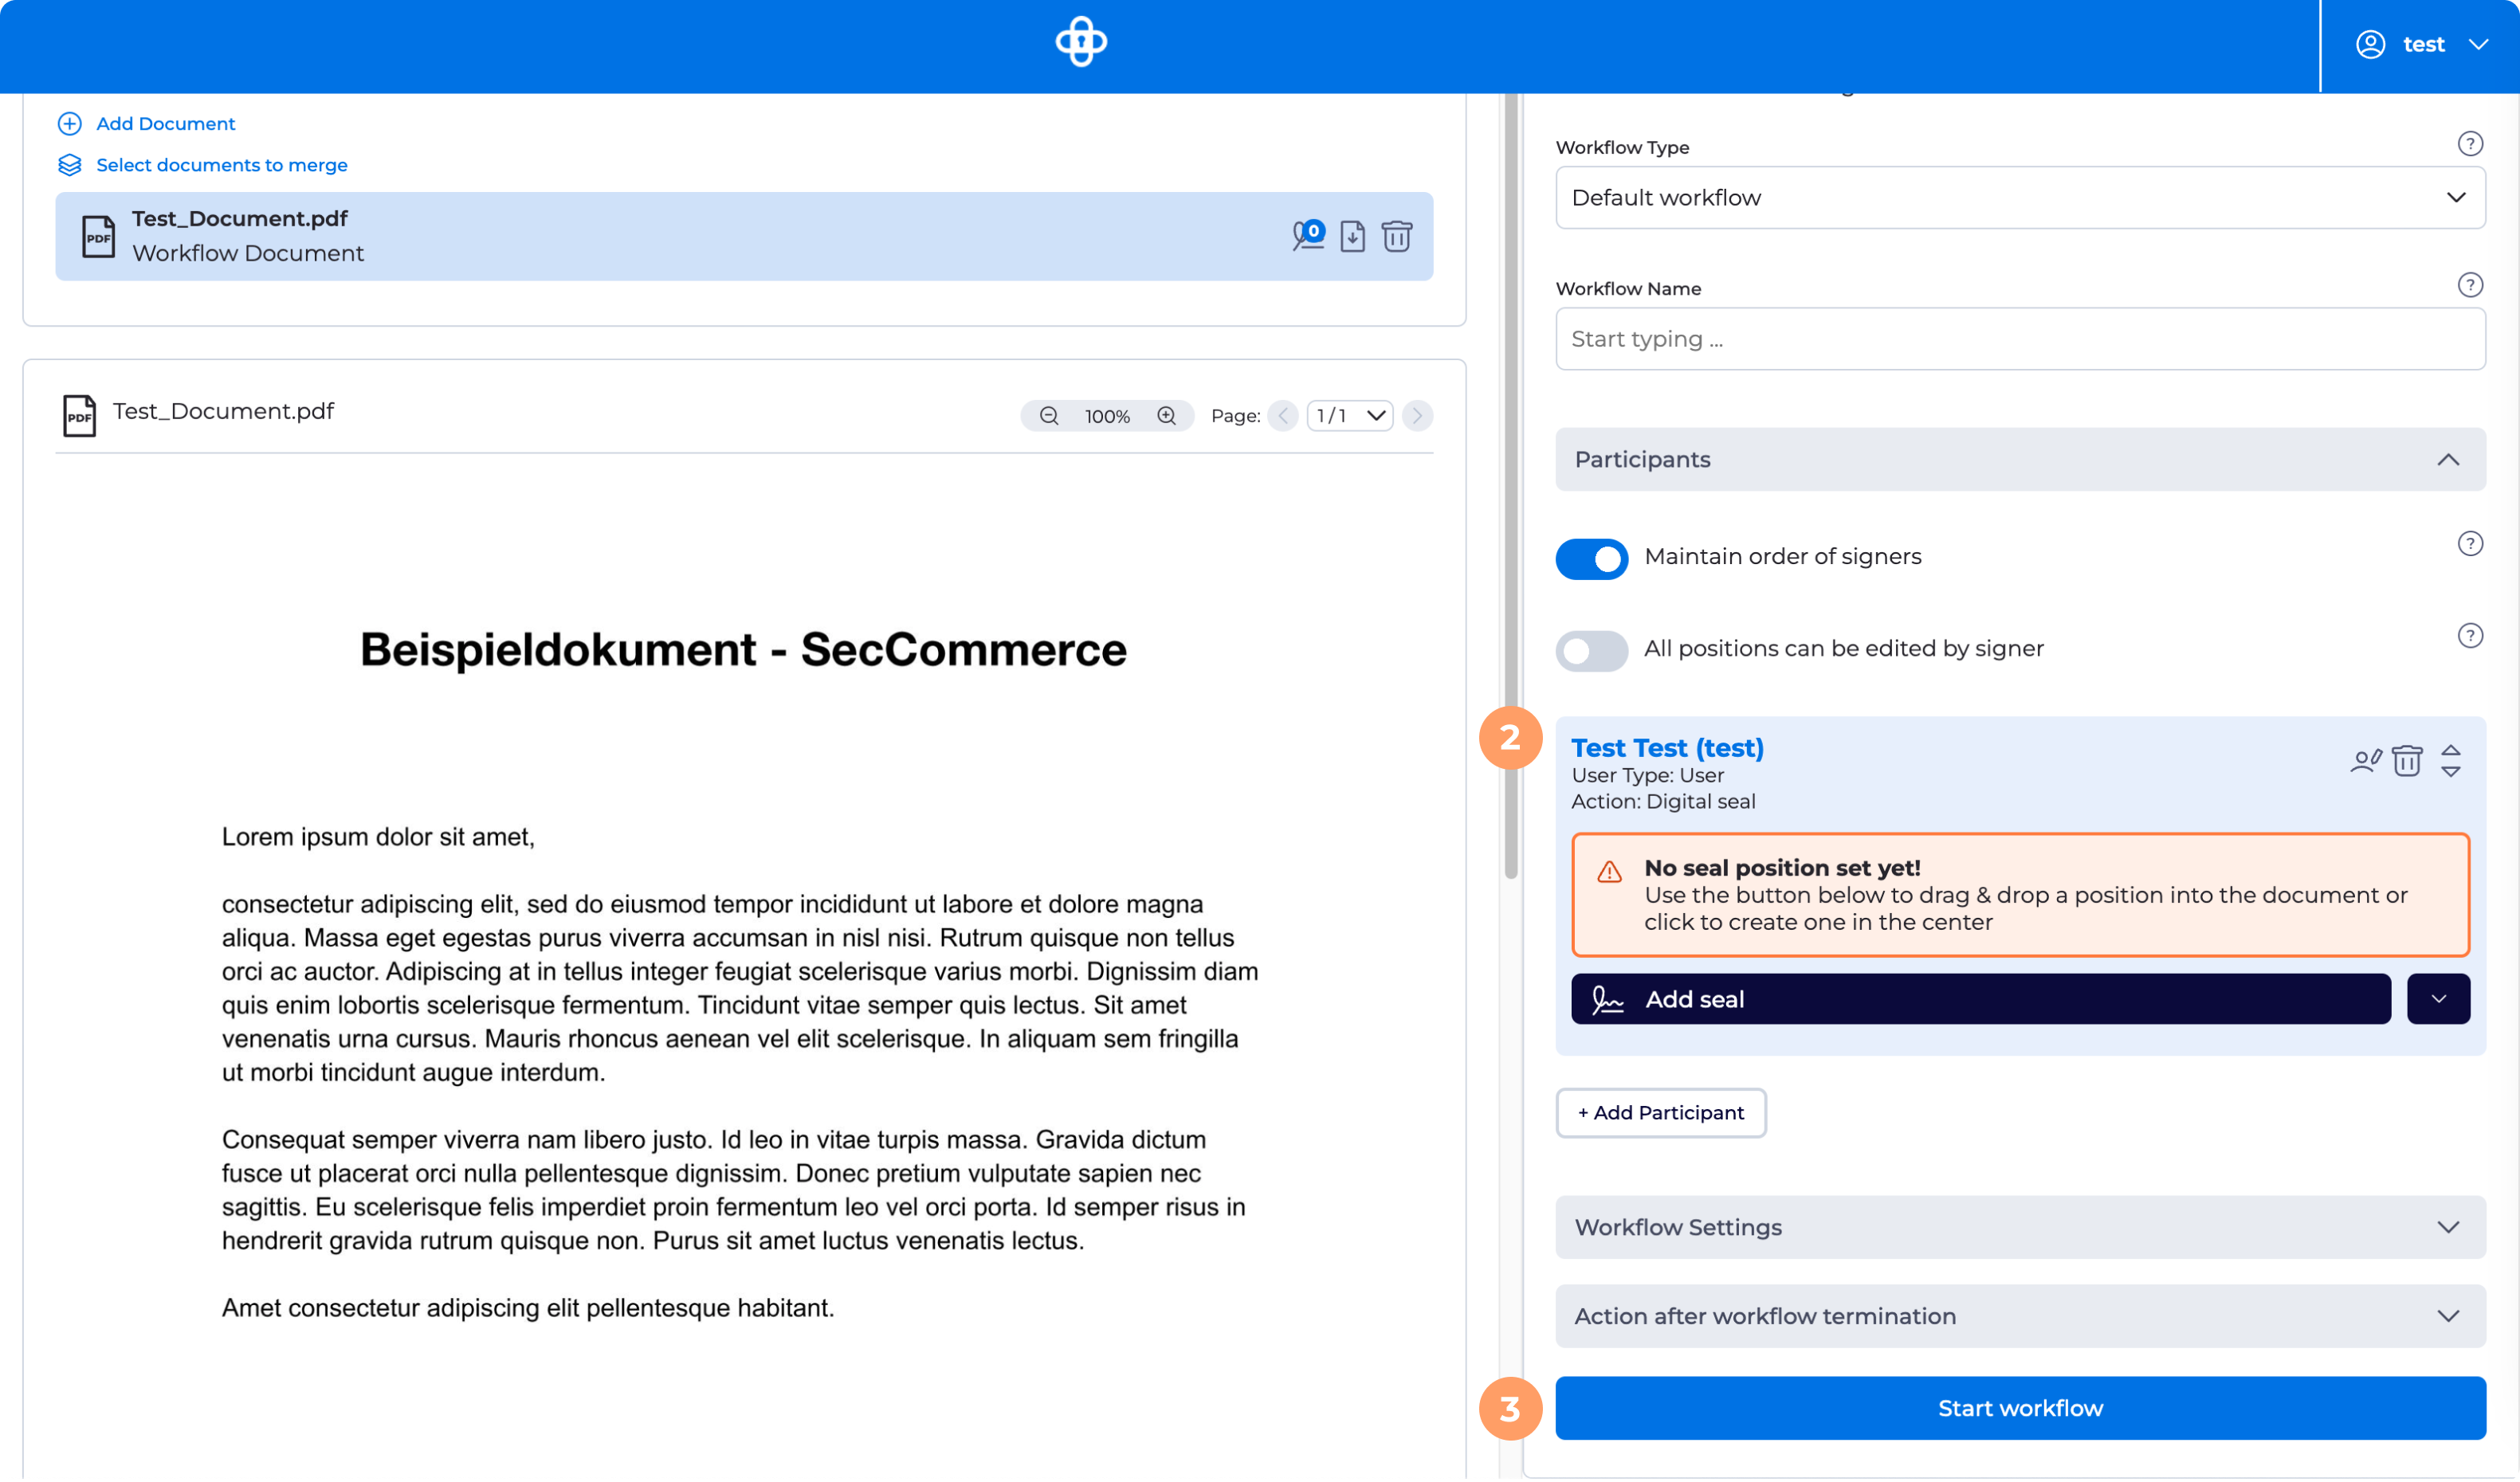
To insert a seal on a document, first select the field “Sign with remote seal” (also available as non-remote seal) on the dashboard: After clicking the “Sign with remote seal” button, the page for selecting the PDF document to be sealed follows. Click here on the “Add file” button or drag the desired document into the area. After selecting the document (“Add file”), the document is uploaded by pressing the “Upload” button. In the next step, a dialog appears. Now the position on the document for the seal must be selected. The signature annotation can be placed manually via “Drag & Drop”. To do this, click with the left mouse button on the dark “Add signature” button, hold it down and drag the seal to the desired position on the PDF page. Only when the correct position has been found, release the left mouse button – the seal has now been successfully placed. After the seal has been placed in the desired position, click on the dark “Qualify electronically seal” button. After performing the above steps, you can download your document sealed. This completes the sealing process successfully. Do you have files that should be sealed automatically without user interaction? Here, we often talk about batch or mass signatures. With our solution, you can go different ways. Another special feature of our solution is that you have different variants to insert a visible signature note, the so-called signature annotation, into the document. Sealing via the API in this case is an automated process. So, for example, certain announcements can be automatically sealed by our server before sending or publishing. Here, a signature annotation is placed on the PDF through keyword positioning in the document. In this case, a simple electronic signature is used for signing. So that the signed PDF documents are still protected from alteration and everyone can see that they were created with your Signature Portal, all files that were part of the workflow and the workflow logs are automatically sealed at the end of the workflow. When you create a workflow, you can combine users with different actions (signature levels) in a workflow. For example, you could say that in a workflow X participants should sign with a Simple Signature or qualified signature, and one user should apply a seal. We want to show exactly this case in this popular example. First, the document to be sealed must be uploaded under “Create a new workflow”.
If necessary, an order can be established. In the next step, the seal must now be positioned on the document (2). Finally, the workflow can now be started (3). 
https://seccommerce.com/elektronisches-siegel-signatur-eidas.
Content
Variants of a Seal
Qualified Seal ID
Sealing via a remote signature server of a trust center (validated trust service)
Thus, all files remain on your server until they are signed and further processed.
Sealing with the Smartcard/Seal Card

Special Features of the Signature Image
Process of a simple electronic signature and an automatic seal

Application Areas
Application Scenarios
Case 1: Sealing via Direct-Seal Website
Here, only authenticated and authorized users may access the seal and use it.

Case 2: Automatic Sealing via API with Keyword Positioning


Case 3: Signature with a simple electronic signature followed by automatic sealing at the end of the workflow

Case 4: Sealing as an Action in a Workflow in the Signature Portal
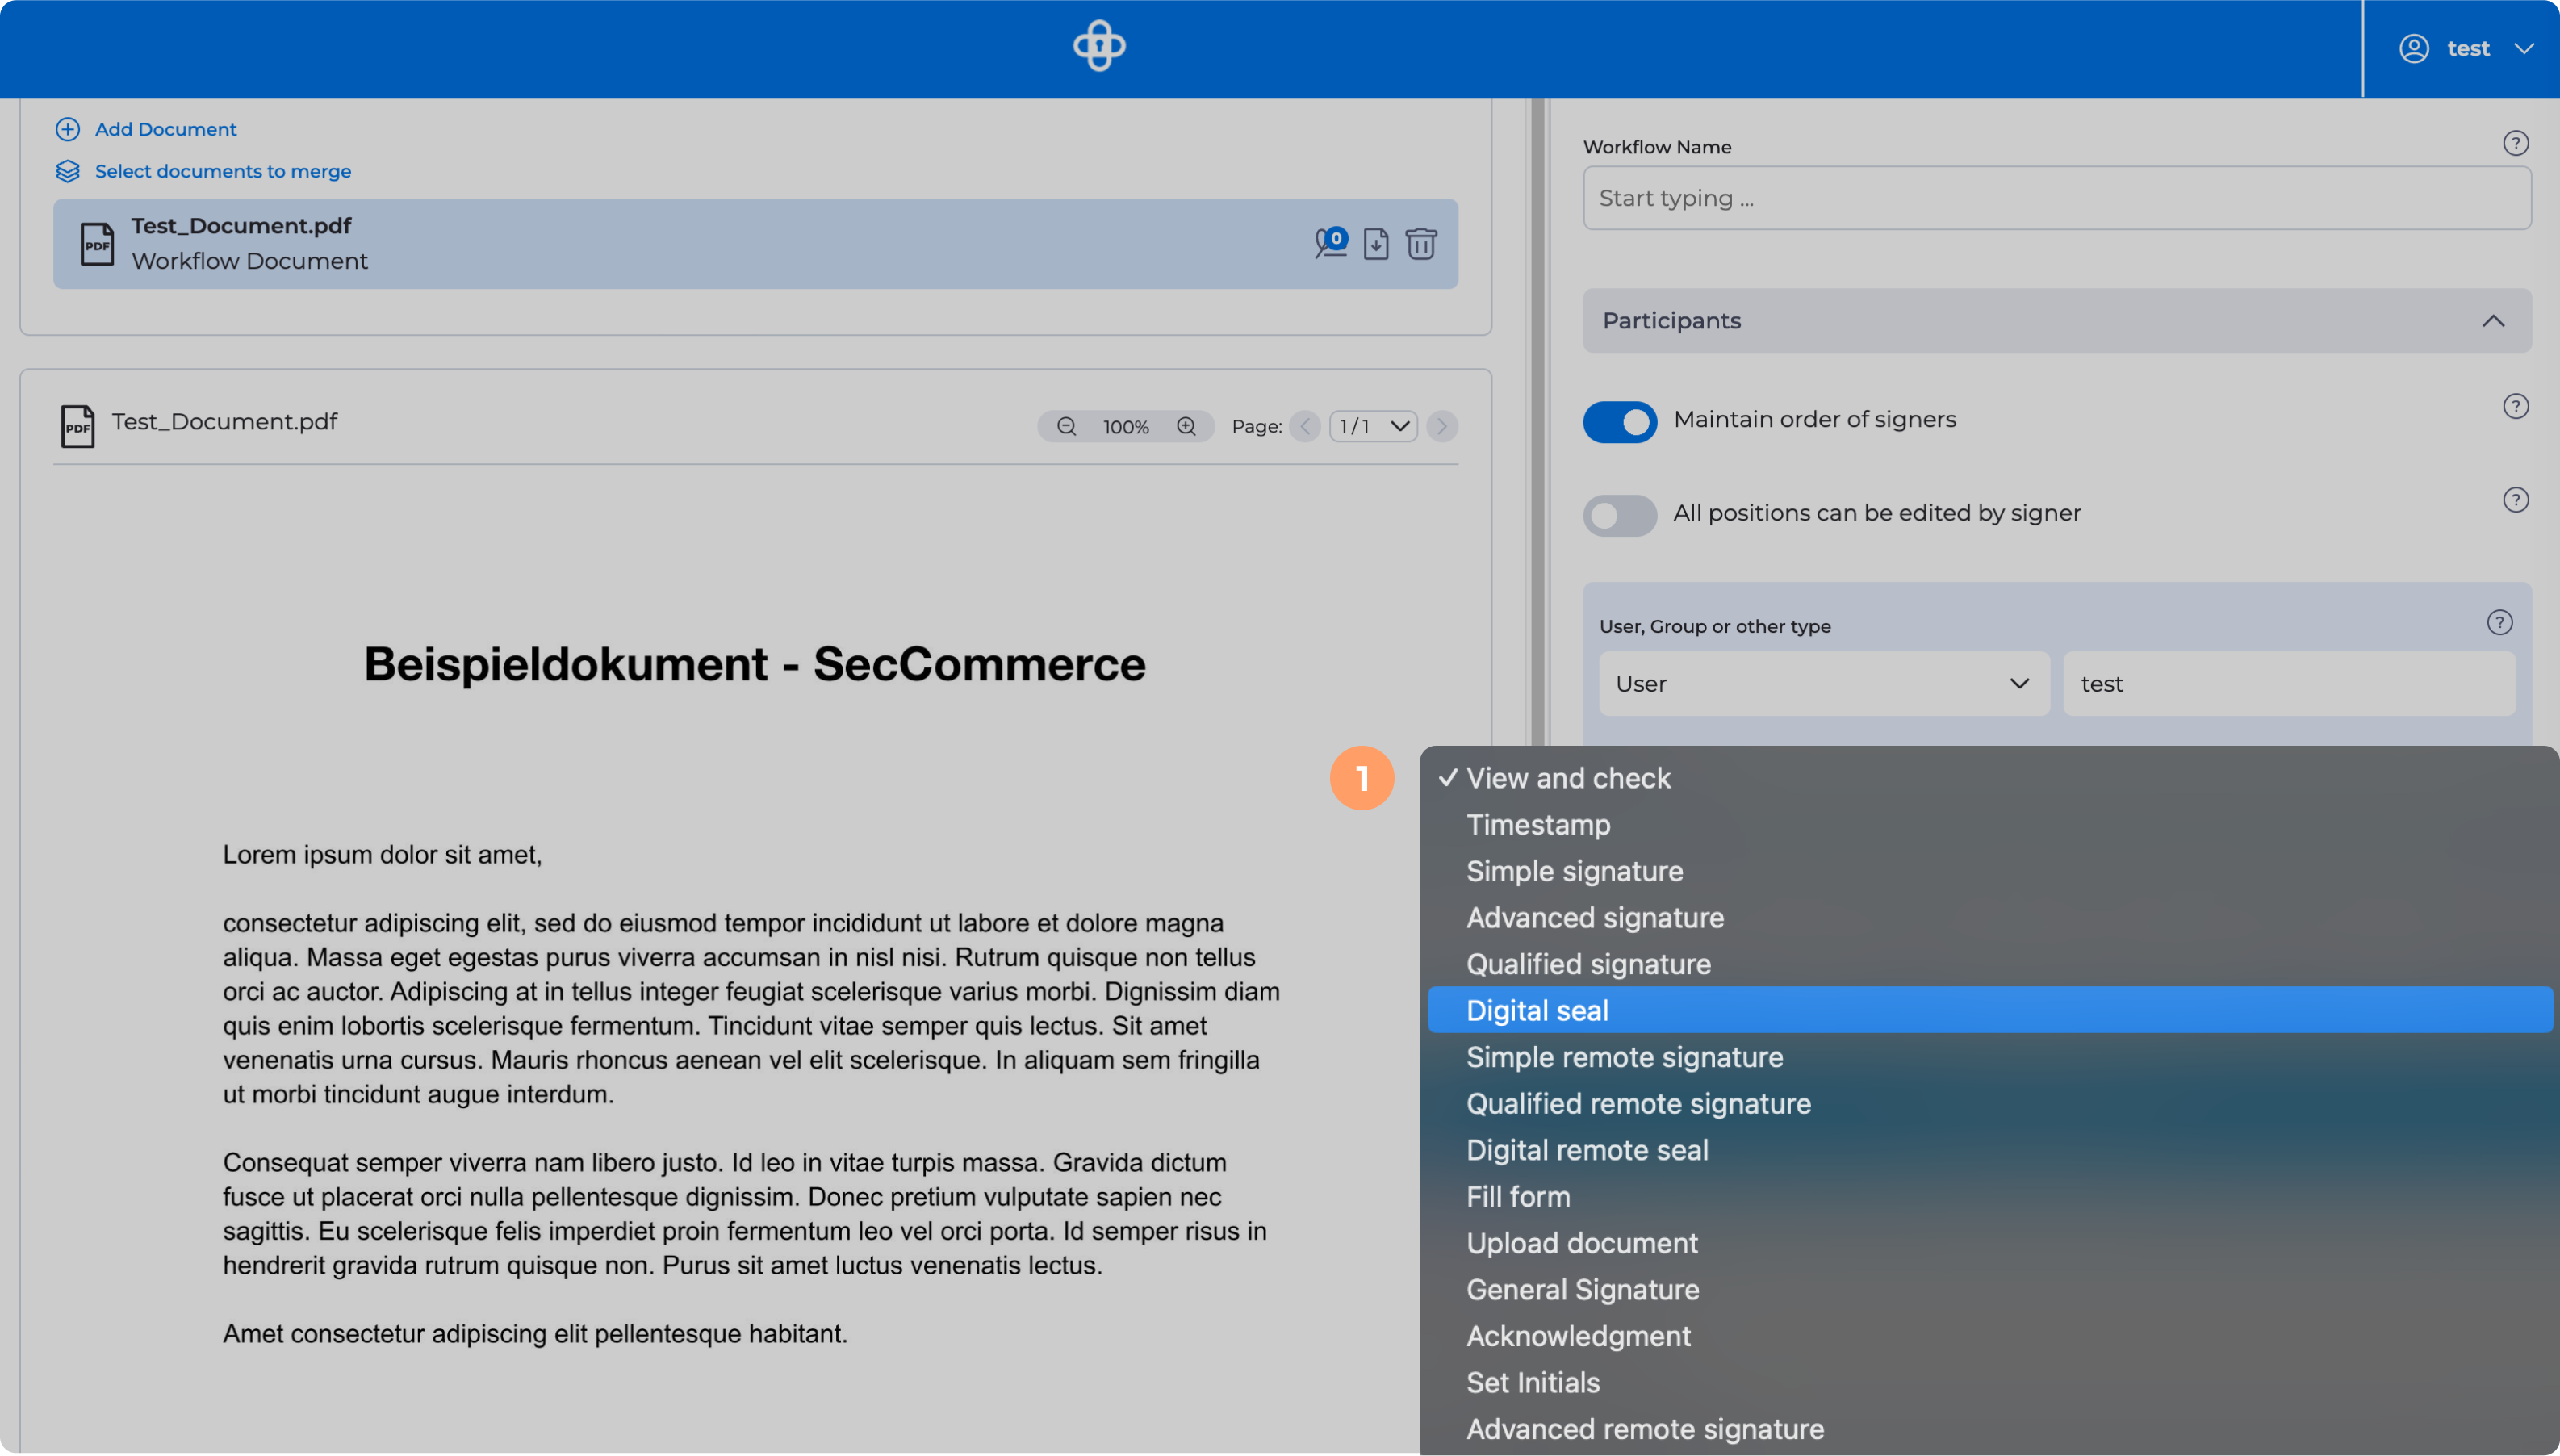
Furthermore, it is possible to make the signature annotation editable by the participants. Next, a user must be entered. This user can also be the workflow creator himself.
To now seal electronically in a qualified manner, the option “Qual. Electronic Seal” (1) must be selected under Action. Then, the participant is saved. If you also want a qualified electronic signature on the document, perform the same steps but select “Qualified Remote Signature” for the corresponding user as the action.

Product Comparison
SecCommerce
Menü
Electronic Signatures
- The Signature Portal
- Signature types
- Signature tools for end users
- FAQ (SecSigner)
- Signatures in web applications
- Substitute scanning and signing (e-records)
- Digital mailroom and digital signature for incoming mail
- Multiple signatures used for workflow
- Verification and creation of mass signatures or individual signatures on server side
- Long term archiving with hash trees
- Remote Qualified Electronic Signature
- Electronic Seal eIDAS
- Identity and Access Management IdM 2FA
- Email Signatures
Encryption
Private Cloud
High security and easy to use
Client Software
SecSigner
Create electronic signatures
SecCardAdmin
Administration of signature cards
Signatur Workflows
Signature Portal
Complex signature workflows with all signature types
SecArchive
Substitute scanning
SecPKI Server
Central server of several products
SecVerification Server
Verification & decryption
SecSigner Server
Encryption & signature creation
SMTP Mail Gateway
Automated email encryption
Two Factor Authentication
SecRouter
Secures website access
SecAuthenticator
User identification
SecSignID
Two Factor Authentication
SecSignID Server
SecSignID on-premise solution
File storage & sharing
SecSign Portal Server
Secure messaging and file sharing